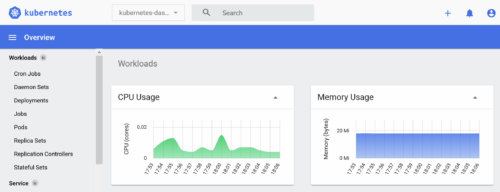
Inspired by this article of Scott Hanselman, we decided to build our own Kubernetes cluster but using the lightweight implementation of k3s and a few Raspberry Pis running Raspberry Pi OS. To wrap it all up we will install the Kubernetes Dashboard as well.
So what are we going to do?
- Prepare all the Raspberry Pis for installation of k3s
- Install k3s on all the Raspberry Pis
- Install the Kubernetes Dashboard
Prepare all the Raspberry Pis for installation k3s
To prepare the Raspberry Pis we need to do the following:
- Configure IP tables
- Disable swap
- Configure cmdline.txt
- Ensure all hostnames are unique
- Configure 64-bit kernel
These actions need to be done on each of the Raspberry Pis. Since these changes require a reboot to take effect it might make sense to perform your reboot once all four configuration steps are complete.
Configure IP tables
K3s currently does not support nftable-backed distributions and only (legacy) iptables we need to switch over to iptables (support for nftables is currently available in the Latest release channel of k3s, but not yet in the Stable release channel).
To switch to iptables we execute these commands:
$ sudo iptables -F
$ sudo update-alternatives --set iptables /usr/sbin/iptables-legacy
$ sudo update-alternatives --set ip6tables /usr/sbin/ip6tables-legacy
$ sudo reboot
Disable swap
Since swap creates performance problems with Kubernetes we need to disable swap before installation:
$ sudo dphys-swapfile swapoff
$ sudo dphys-swapfile uninstall
$ sudo update-rc.d dphys-swapfile remove
You need to reboot your Raspberry Pi for the change to take effect.
Configure cmdline.txt
We need to enable cgroups correctly for Kubernetes. Open /boot/cmdline.txt in an editor.
$ sudo nano /boot/cmdline.txtWe need to add the following to the end of the line in /boot/cmdline.txt. Make sure you don’t add a newline at the end.
cgroup_enable=cpuset cgroup_memory=1 cgroup_enable=memoryYou need to reboot your Raspberry Pi for the change to take effect.
Ensure all hostnames are unique
For the cluster to function correctly the hostnames of each of the Raspberry Pis need to be unique. The easiest way to do this is to use the raspi-config utility.
$ sudo raspi-configChanging the hostname will require a reboot of the Raspberry Pi.
Configure 64-bit kernel
Since many services/containers out there are built targeting the 64-bit ARM processor we may want to set our kernel to run in 64-bit as well. This is optional, but if you decide to switch over to 64-bit at a later date you will have to re-install k3s. Ideally we want to use a full 64-bit OS, but at this time Raspberry Pi OS 64-bit is still only in beta.
To run the kernel in 64-bit we want to edit /boot/config.txt and add the following at the end of the file.
arm_64bit=1After editing the file ensure that you reboot the device.
Install k3s on all the Raspberry Pis
We will be installing k3s from the Stable channel. For this example, we will be installing a server with two agent nodes (at the time of writing, the current Stable release of k3s only allows for a single server, but the Latest release has support for several server nodes).
Note: k3s uses the terms “server” & “agent” nodes, instead of the traditional “master” & “worker” nodes, however from the kubectl outputs you will still see reference to the “master” role.
Also, note that we will be using MetalLB as a load-balancer and Nginx as ingress controller. We’ve found that in general those two are more widely used than the defaults installed by k3s.
Our process will be as follows:
- Install the k3s server node
- Install the k3s agent nodes
- Intall Helm
- Install MetalLB
- Install Nginx as ingress controller
Install the k3s server node
Firstly, we need to install k3s on the server node:
$ curl -sfL https://get.k3s.io | sh -s - --write-kubeconfig-mode 644 --no-deploy servicelb --no-deploy traefik--write-kubeconfig-modeallows for writing to the kubeconfig file.--no-deploy servicelbensures the k3s doesn’t install a load-balancer, since we will be installing MetalLB later in the process.--no-deploy traefikensures that k3s doesn’t install Traefik as ingress controller. We will be using the Nginx ingress controller.
Install the k3s agent nodes
We need to obtain the server token so that we can use it to set up the agent nodes. The server token is obtained from /var/lib/rancher/k3s/server/node-token:
$ sudo cat /var/lib/rancher/k3s/server/node-token
K10f491d84da33f3080b547ad74395ffca7d9615bfa7213f9da13f922a034e5d1fb::server:d326b9ae03af3670a20b32a49aa9fc5d
Then we install each of the agent nodes. The format of the command is as follows:
curl -sfL https://get.k3s.io | K3S_URL=https://masterNodeIP:6443 K3S_TOKEN=servertoken sh -By including the server token k3s will install an agent node and add it to the cluster. So for our example, we will execute the command as follows:
$ curl -sfL https://get.k3s.io | K3S_URL=https://192.168.0.151:6443 K3S_TOKEN=K108ef5976bbb1245c1fe4d2fc3df7b03b49a7bc5613436be7941c28260bdd571d4::server:ef80265b6ecc670f24f15ae8d2e817c3 sh -After running the scripts confirm that all the nodes are added to the cluster by listing the nodes from the server node. Keep in mind that initial startup and adding of agent nodes may take a second or two.
$ kubectl get nodes

NAME        STATUS   ROLES    AGE   VERSION
pi01        Ready    master   12m   v1.18.9+k3s1
pi02        Ready    <none>   93s   v1.18.9+k3s1
pi03        Ready    <none>   5s    v1.18.9+k3s1
The Role of “master” indicates the server node.
You can deploy containers to the cluster. Tip: you can install kubectl on your development machine to make it easier.
Install Helm
Helm is a package manager for Kubernetes and provides and simplified way of installing applications that generally have more complicated configuration requirements. It uses charts that define the configuration and there is an official repository of charts available at artifacthub.io.
To install helm use the instructions available on the Helm documents page. We found it simplest to make use of the Helm installation script.
After installation we want to add the official charts repository using the following:
$ helm repo add stable https://charts.helm.sh/stable
$ helm repo update
A few using Helm commands to note:
- Installing applications:
helm install <install-as-name> <chart-name> --namespace <namespace>
If you have properties you want to change during the installation you can include--set <property-name>=<new-value> - Uninstall applications:
helm uninstall <install-as-name> --namespace <namespace> - List applications:
helm list --namespace <namespace>
Install MetalLB
MetalLB provides a load-balancer for bare metal Kubernetes installations. This means that every time a service is installed of type LoadBalancer on Kubernetes, MetalLB will automatically allocate a virtual IP address to it.
We will be using Helm to install MetalLB. In our example, we will put the installation in the metallb namespace, but feel free to put this in any namespace you prefer (many prefer to use kube-system since it is so closely tied to the core cluster functionality).
Adjust the IP address range to whatever works best for you.
$ helm install metallb stable/metallb --namespace metallb \
--set configInline.address-pools[0].name=default \
--set configInline.address-pools[0].protocol=layer2 \
--set configInline.address-pools[0].addresses[0]=192.168.0.201-192.168.0.250
Once it is done installing you can can view the pods created for MetalLB:
$ kubectl get pods -n metallb
NAME                                        READY   STATUS    RESTARTS   AGE
metallb-speaker-8hzrz                       1/1     Running   6          5m33s
metallb-controller-96765d758-crn45          1/1     Running   1          5m33s
metallb-speaker-bwllc                       1/1     Running   3          5m33s
metallb-speaker-sq4wf                       1/1     Running   4          5m33s
Install Nginx as ingress controller
We will be using Nginx as our Kubernetes Ingress Controller, to route external traffic to services in the cluster.
Once again we will make use of a Helm chart to do the installation for us. You will notice we set the property to disable the default backend, since we don’t require it. We will make use of the nginx-ingress namespace, but feel free to use any namespace name you prefer.
$ helm install nginx-ingress stable/nginx-ingress --namespace nginx-ingress --set defaultBackend.enabled=falseOnce complete we can view the deployed controller and service.
$ kubectl get pods -n nginx-ingress
NAME                                        READY   STATUS    RESTARTS   AGE
nginx-ingress-controller-86db4564b5-2fl7c   1/1     Running   0          21h

$ kubectl get svc -n nginx-ingress
NAME                       TYPE           CLUSTER-IP      EXTERNAL-IP     PORT(S)                      AGE
nginx-ingress-controller   LoadBalancer   10.43.96.206    192.168.0.201   80:30835/TCP,443:31913/TCP   6d8h
Feel free to navigate to the external IP allocate to the service to see the HTTP 404 page served by Nginx, proving that it has been deployed.
Install the Kubernetes Dashboard
To view nice values and metrics of our cluster we can install the Kubernetes Dashboard.
We follow these steps:
Install the dashboard
To install the dashboard we use the recommended configuration provided by the Kubernetes Dashboard GitHub site.
$ kubectl create -f https://raw.githubusercontent.com/kubernetes/dashboard/v2.0.4/aio/deploy/recommended.yamlConfigure an admin user
We then need to configure an admin user. We create two yml files: one to create the Service Account (user) and one to create the role binding for the Service Account. Keep in mind these are example users for full access to the cluster and it may pose a security risk.
admin-user.yml
apiVersion: v1
kind: ServiceAccount
metadata:
  name: admin-user
  namespace: kubernetes-dashboard
admin-user-role.yml
apiVersion: rbac.authorization.k8s.io/v1
kind: ClusterRoleBinding
metadata:
  name: admin-user
roleRef:
  apiGroup: rbac.authorization.k8s.io
  kind: ClusterRole
  name: cluster-admin
subjects:
- kind: ServiceAccount
  name: admin-user
  namespace: kubernetes-dashboard
Then we apply these files to create the user:
$ kubectl apply -f dashboard.admin-user.yml -f dashboard.admin-user-role.ymlNow we need to get the token of the created user so that we can user it to log into the dashboard
$ kubectl -n kubernetes-dashboard describe secret admin-user-token | grep ^token
token:      eyJhbGciOiJSUzI1NiIsImtpZC......tCuPSd66tZ27UquTJBpzF-6A0y_U0qCoCt63aQD6RXw
View the Dashboard
You can view the dashboard by running kubectl proxy and then navigating to http://localhost:8001/api/v1/namespaces/kubernetes-dashboard/services/https:kubernetes-dashboard:/proxy/. However, you will need to tunnel through to that port from our development machine, since this it is hosted on your server Raspberry Pi.
Alternatively we can get the IP address of the dashboard and tunnel to it directly:
$ kubectl get svc --namespace kubernetes-dashboard
We can then create an SSH tunnel from our host machine to the dashboard:
$ sudo ssh -L 9797:10.43.99.66:443 pi@192.168.0.151Once the tunnel is established you can navigate to the tunnelled port (9797 in this example) from your browser. On the login screen enter the token and then you can view details on the dashboard (choose the namespace in the top toolbar):