
Oftentimes you only want to use a Raspberry Pi without any monitor or keyboard, known as running the Raspberry Pi headless. This post will focus on achieving that with Raspberry Pi OS (formerly known as Raspbian).
The basic steps are:
- Install Raspberry Pi OS
- Enable SSH
- Configure your wireless network (optional)
- Connect to your Raspberry Pi
- Update your Raspberry Pi
Install Raspberry Pi OS
You will need to install your OS of choice on the MicroSD Card used by your Raspberry Pi. If your computer does not have a slot for SD cards you will need to acquire an adapter first, so that you can access the SD card via another way, such as the USB port of your computer.
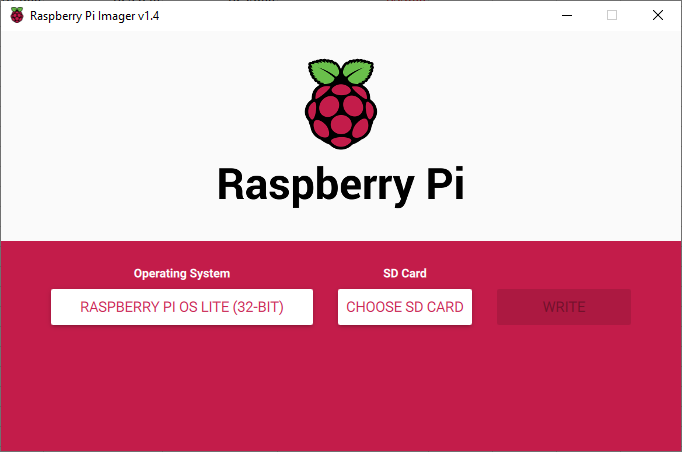
The easiest way to install Raspberry Pi OS is to use the official Raspberry Pi Imager. Since your Raspberry Pi will be running headless it probably makes sense to use the light-weight version of the OS called “Raspberry Pi OS Lite (32-bit)”, so make sure to choose that option. After specifying the OS and selecting your SD card you can click on the “Write” button. The imager will write to your SD Card and afterwards verify that everything was written successfully.
Note: Keep in mind that anything that is present on the MicroSD card will be erased during the write process of the imager.
Enable SSH
Since you won’t be using a monitor or keyboard you need to access your Raspberry Pi remotely. The best way to do this is by using SSH. In order to enable SSH on your Raspberry Pi, you need to create a file called ssh in the boot folder of your MicroSD card. The file is simply an empty file without any extension in the filename. When your Raspberry Pi boots up it will enable SSH and remove the file.
You create the file from your Windows or Mac machine, but if you have just finished writing the OS using the Raspberry Pi Imager you may need to remove your card and put it back in since the Imager may unmount the card after writing to it.
Configure your wireless network
If you need to have access to a WiFi network you will have to configure the wireless access as well. Just like enabling SSH, this is done by creating a file called wpa_supplicant.conf in the boot folder of your newly written MicroSD card before it starts up the first time. When your Raspberry Pi boots up it will copy the file to the correct path to configure the network.
Here is an example of the wpa_supplicant.conf file:
ctrl_interface=DIR=/var/run/wpa_supplicant GROUP=netdev
update_config=1
country=<Specify your ISO 3166-1 country code>

network={
 ssid="<The SSID (Name) of your WiFi network>"
 psk="<The password of your WiFi network>"
}
Connect to your Raspberry Pi
After configuring everything you can now boot up your Raspberry Pi. If you don’t make use of a WiFi network you will need to connect to the network using an ethernet cable.
Once it has booted up you need to identify the IP address of your Raspberry Pi. You can do this by having a look on your router or making use of a mobile app like Fing to scan your network.
Once you have the IP address you can use whichever SSH client you prefer to connect to your Raspberry Pi. By default the username is pi and the password is raspberry.
ssh pi@192.168.0.151
pi@192.168.0.151's password:
The first time you connect to the Raspberry Pi you will also be prompted to confirm the fingerprint of the SSH certificate. Confirm by entering “y” for yes.
Update your Raspberry Pi
Now that your newly setup Raspberry Pi is up and running it would be a good idea to do a full update.
First we update the apt tool to have the latest package list:
sudo apt updateThen we trigger the full upgrade:
sudo apt full-upgradeTriggering full-upgrade will ensure that all packages and their dependencies are updated. This same command will also update the kernel and firmware of your Raspberry Pi.